Add a ROS localization stream
This page assumes knowledge of ROS.
In Formant, ROS data which relates to a robot's position and surroundings is encapsulated in a single data type called localization.
Localization combines map, path, point cloud, laser scan, odometry, pose, and goal into a single telemetry stream:
ROS message type | Formant data type |
|---|---|
| Localization |
This guide will teach you how to ingest ROS localization data into Formant.
Step 1: Create a ROS localization stream
- In Formant, in the upper-left corner, open the menu and click Settings.
- Click Devices, and then click on the device you want to configure.
- Click the Telemetry tab, and then click Add Stream.
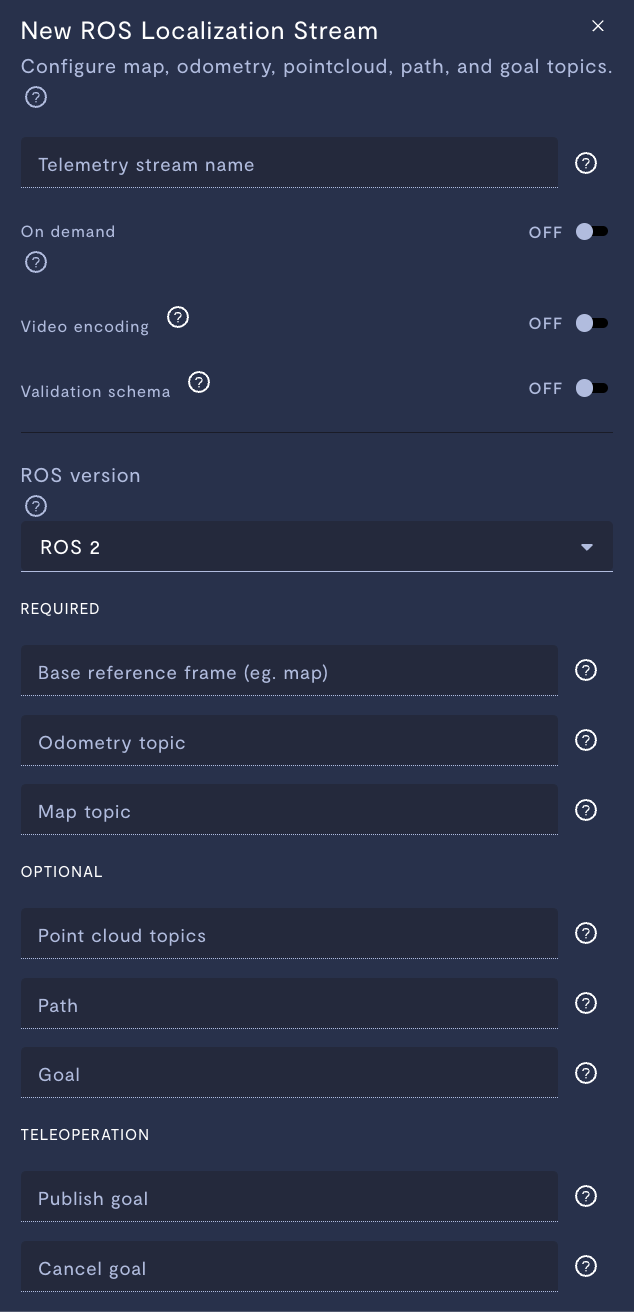
- Click ROS Localization. This will open the New ROS Localization Stream configuration window:

ROS localization telemetry stream configuration.
Property | Usage |
|---|---|
Telemetry stream name | Give the stream a name. |
On demand | If ON, this stream will store data locally on your device, and only upload data to Formant when you click Retrieve on-demand data. If OFF, this stream will ingest periodically. |
Video encoding | Only applicable for |
Validation schema | Only applicable for JSON and text streams. Choose a configuration schema for this stream. |
ROS version | The ROS version of the node publishing the topic. |
Base reference frame | Reference frame in your transform tree you want to use as the base frame. Enter the name of a reference frame, not a ROS topic (e.g., |
Odometry topic | Specify the odometry topic with type Odometry streams can be configured to send data to the Formant UI in real-time, as well as being ingested to the Formant cloud. For more information, see Add a realtime odometry stream. |
Map topic | Specify an occupancy grid with type |
Point cloud topics | Specify the Point cloud streams can be configured to send data to the Formant UI in real-time, as well as being ingested to the Formant cloud. For more information, see Teleoperation: Add a point cloud stream. |
Path | Specify the ROS topic that indicates the path with type |
Goal | Specify the goal topic with type |
Publish goal | This section is configured for teleoperation. We'll discuss this in Add a navigation stream. |
Cancel goal | This section is configured for teleoperation. We'll discuss this in Add a navigation stream. |
Add tags (e.g. | Add tags to each datapoint of this stream. For more information on tags, see Configure access levels. |
Rate limit (Hz) (optional) | If If The default rate is 0.5 Hz. |
- When you're finished configuring your stream, click Done, and then Save.
Step 2: Add stream to a view
Once you've added a stream to your device, your next step is to add it to a view in Formant.
Add the streams you want to visualize, and then move on to Viewing data in Formant.
If you notice an issue with this page or need help, please reach out to us! Use the 'Did this page help you?' buttons below, or get in contact with our Customer Success team via the Intercom messenger in the bottom-right corner of this page, or at [email protected].
Updated 3 months ago
