
Create and apply tags
A tag is a key-value pair which defines a relationship between two entities in Formant. Among their many uses, tags can be used to group entities, and restrict user access to entities.
This guide will teach you how to create and configure a tag, and apply that tag to various entities in Formant to dictate their relationship and access to each other.
Step 1: Create a tag
- In Formant, in the upper-left corner, open the menu and go to Settings >> Tags.
- In the upper-right corner, click the Add Tag button. Give your tag a name and click Continue. This name is your tag key (e.g.,
device-type).
Step 2: Configure your tag
Configure your new tag as follows:
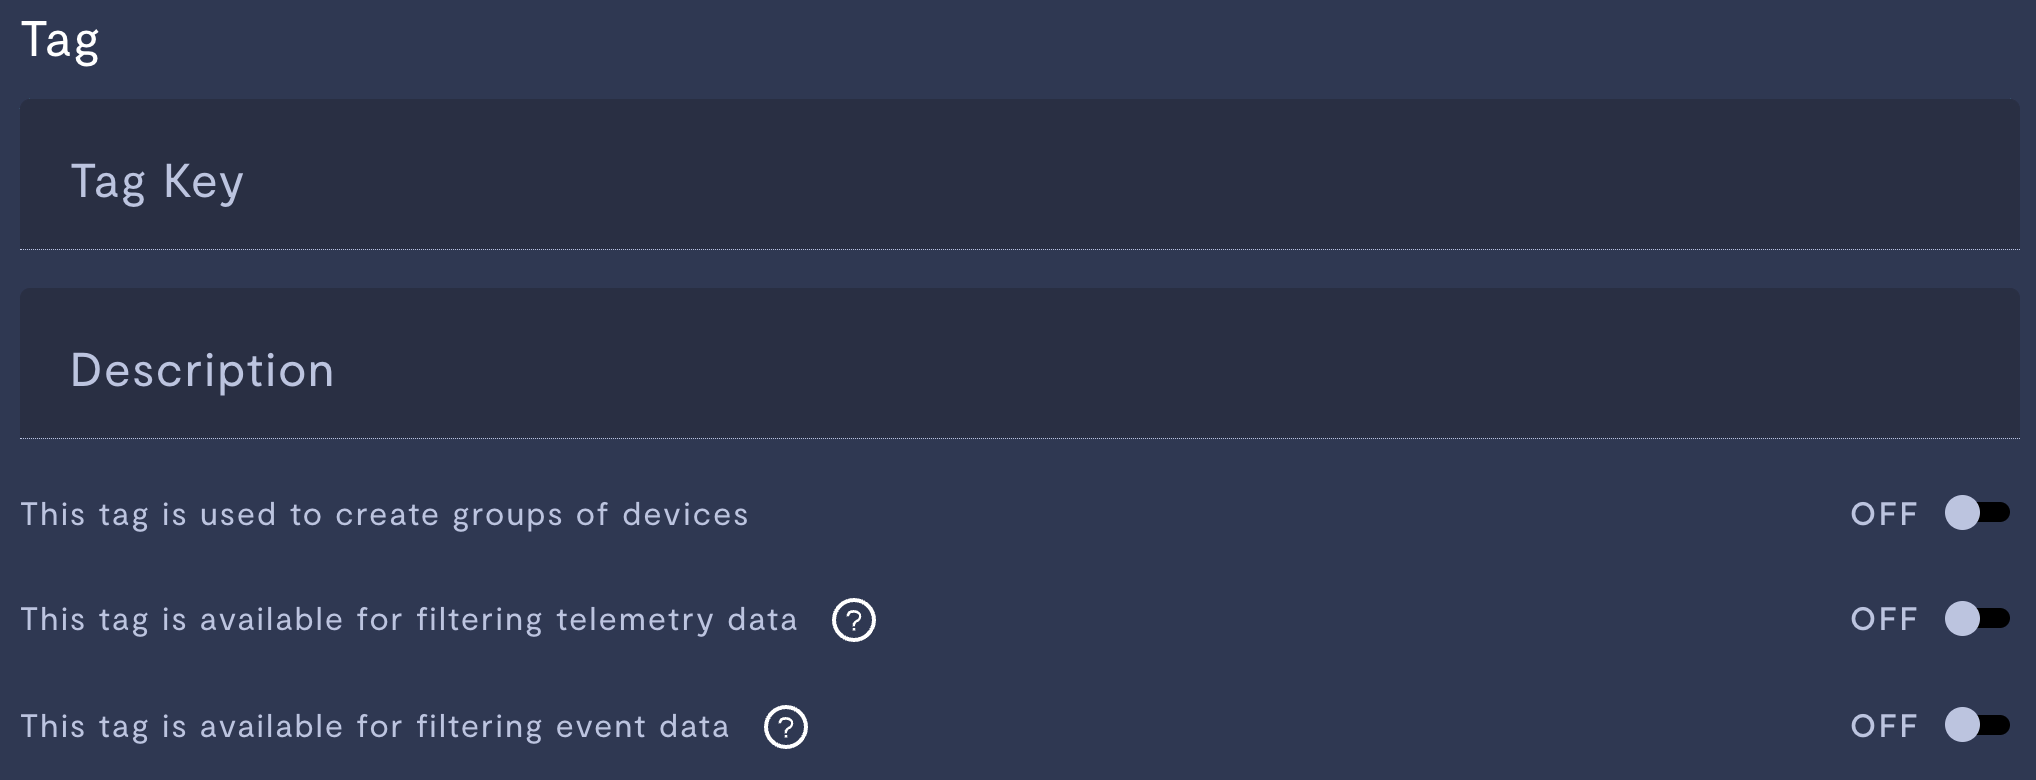
Tag configuration.
| Property | Usage |
|---|---|
| This tag is used to create groups of devices | If set to ON, you can use this tag as a group tag. This will let you create a device group linked by this tag. For more information, see Create a device group. |
| This tag is available for filtering telemetry data | If set to ON, you can use this tag to filter data in an observability view. In an observability view, click the three dots >> Show filters. If you select this tag, you will only see data with this tag. |
| This tag is available for filtering event data | If set to ON, you can use this tag to filter events in the event list. On a device, click the bell icon to open the events list. Click the filter icon. If you select this tag, you will only see events with this tag. |
Step 3: Apply a tag to a device
You can apply up to 25 tags to a resource.
Frequently changing tag sets may impact performance.
- In the tag configuration screen, click the Choose Devices tab.
- Set the tag value you want to apply to your devices (e.g.,
spot). Click Continue. - Select the device(s) to which you want to apply the tag. Click Continue.
- Click Apply to confirm your changes. Your tag key and value will be applied to your device(s) (e.g.,
device-type: spot).
Step 4: Apply a tag to a user
Users can only see entities whose tags are equal to or a subset of their own. To apply a tag to a user:
- Go to Settings >> Users.
- Select the user to whom you want to apply the tag.
- Click Restrict Access and use this view to see existing tags in your organization and apply them to this user.
Tagging service accountsService accounts show up under Settings >> Users, but do not have the Restrict Access tab.
To apply a tag to a service account, in the Edit service account window, click Show advanced settings and enter the
key: valuepair.
See also
If you notice an issue with this page or need help, please reach out to us! Use the 'Did this page help you?' buttons below, or get in contact with our Customer Success team via the Intercom messenger in the bottom-right corner of this page, or at [email protected].