
Annotations and annotation templates
Annotations are user-entered records that add commentary to robot telemetry or mission data. They can be published in a number of ways, including through the Formant web application, the Cloud SDK, and through the Formant Admin API.
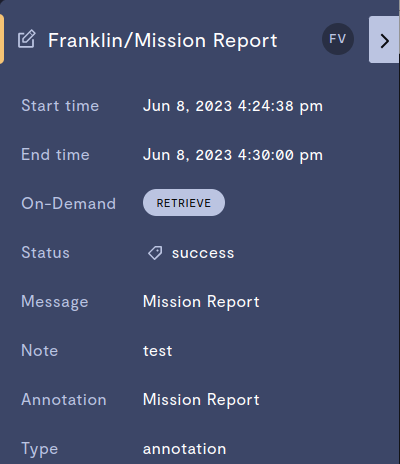
An annotation.
Annotations appear on the timeline, and can be expanded to show detail.
Optionally, you can create an annotation template within Formant or in Google Sheets. Annotations can be published or exported to Google Sheets for further analysis.
Step 1: Create an annotation template
- In Formant, in the upper-left corner, open the menu and click Settings.
- In the upper-right corner, click Add Annotation.
- Name your annotation template.
Step 2: Configure access levels
Under the Choose Devices tab, select a tag set which matches the set of devices you want to grant access to this annotation template.
For more information on tags, see Configure access levels.
Step 3: Define your annotation template
In the Formant web application
- Click Add tag to create a new field in the annotation template:
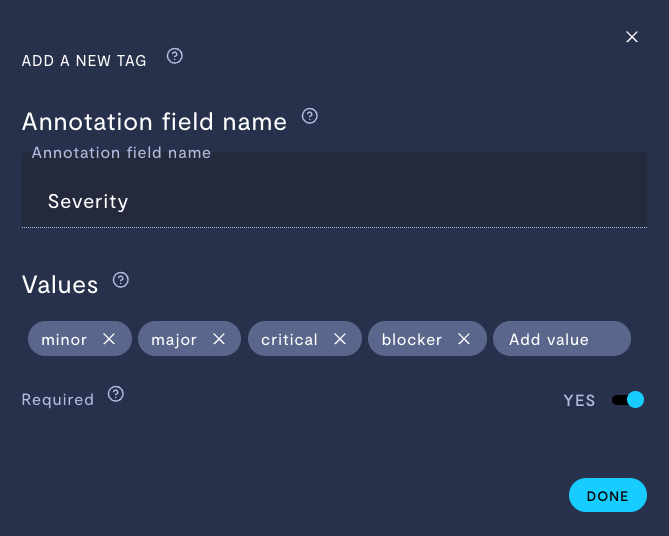
Defining an annotation template.
| Property | Usage |
|---|---|
| Annotation field name | Name this field in the annotation template. |
| Values | Enum values for this field. |
| Required? | If YES, this field must be entered to create an annotation from this template. |
Annotation templates automatically include a Notes field. The Notes field can be used to add description or additional information that may not be captured by the enum values for each field.
Using Google Sheets
- Enable the Formant Google Sheets integration.
- Configure your Google Sheet to define an annotation template (see below).
- Click Add Sheets. Provide the URL to each tab in your Google Sheet.
- Click Save.
Annotation template format in Google Sheets
- Each tab in a Sheet is a field in the annotation template.
- The
A1cell must contain the field name. - Each entry in the
Acolumn contains the text of an enum option for this field. - The
Bcolumn can be used to provide values for a sub-field ofA1.
Suppose we want to create an annotation with three fields: Job Name, Activity Name, and Subactivity, such that our end result looks like this:

Annotation template used for annotating Jobs
Our Google Sheet would look like this:

Jobs tab.

Activities tab.

Subactivities tab. When an Activity Name is chosen by the user, they will be able to select a matching value from the Subactivity column.
Location column has no effectNote that, because the Location column in the Jobs tab is not in column
A, and does not have a mapping in any other sheet, it does not appear in the annotation template in Formant.
Click here to view the example in Google Sheets.
Updates made to the annotation template in Google Sheets may take a few minutes to propagate to Formant.
Create an annotation from an annotation template
Annotations can be created from a device view, or from a module.
- Navigate to the device for which you want to create an annotation.
- In the upper-right corner, click the three dots >> Annotate.
- From the device channel or modules more menu select Annotate.
- Select the annotation template you want to use.
- Select the time range relevant to this annotation.
- Fill in the fields defined in the annotation template.
- Add any additional notes.
- Tag a user related to this annotation.
- Click Save to create your annotation.
Annotations are visible in the timeline.
Clicking an Annotation causes it to be selected and details visible in a header. The header includes an Edit button which is used to change annotated data after it has already been created. The header also includes a Delete button which deletes the annotation record.
Publish an annotation to a Google Sheet
- Navigate to Settings >> Annotations and select the annotation you want to publish to Google Sheets.
- Under the Publish tab, enter the URL of the Sheet to which you want to publish annotations.
When an annotation is created it is appended to the sheet. When the annotation is updated, the sheet is also updated.
There are some limitations to publishing to Google Sheets:
Caveats when publishing annotations to Google Sheets
- The user should not add or delete any rows that have been added by Formant. This may cause the wrong rows to be updated when the annotation is updated.
- Changing the annotation template will change the spreadsheet column used for each field in the template because Formant does not read the spreadsheet header row to determine what the columns are.
- Only exports to the first tab in the spreadsheet.
- Does not delete the exported annotation if it is deleted in Formant Export Annotation.
Annotations can be also exported from the events page by using the Export button at the bottom of the page. The Export button respects filters on the events page. Hence, to download only the annotation, filter down the event type to Annotation and then export to Google Spreadsheet.
See also
If you notice an issue with this page or need help, please reach out to us! Use the 'Did this page help you?' buttons below, or get in contact with our Customer Success team via the Intercom messenger in the bottom-right corner of this page, or at [email protected].
Updated 8 months ago