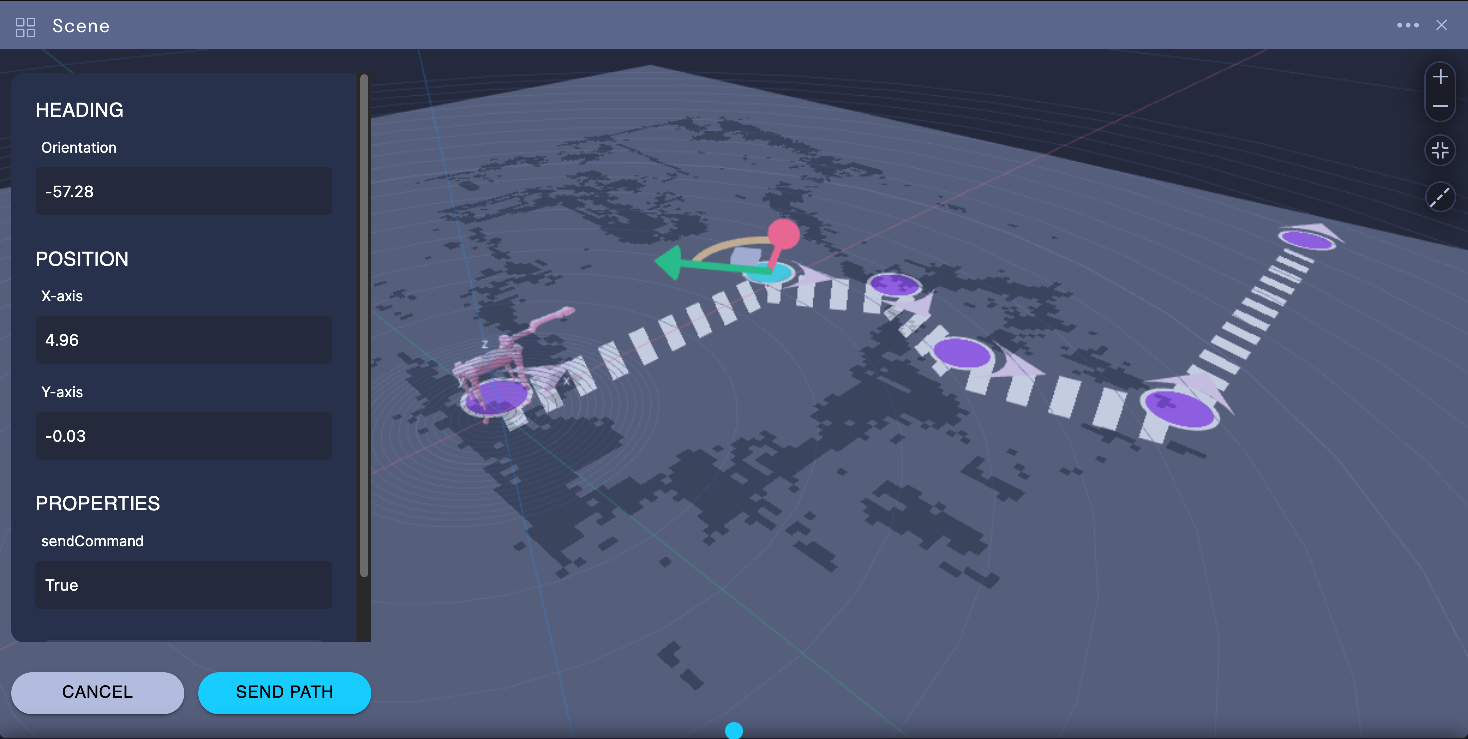
Plan a mission
This guide will teach you how to plan and execute a mission in the 3D Scene module.

Step 1: Configure a mission layer
To add a mission to your 3D Scene module:
- In Formant, navigate to the 3D Scene module you have created for your device.
- In the upper-right corner of the module, click the three dots >> Configure.
- Scroll down to Mission and click Add.
- Configure your mission:
Property | Usage |
|---|---|
Command name | Enter the name of the command you will use to send the waypoints to your robot. |
Path type |
|
Path width | Set the static width of your path. |
- (Optional) If you want to send specific commands to your robot at each waypoint, scroll to Add Properties and click Add...
| Property name | Usage |
|---|---|
| Type | Enter the data type of the message you want to send to your robot at this waypoint. |
| Name | Give the waypoint property a name. |
| Default | Set a default value to be sent to the robot if another value is not specified. |
- Click the Add button, and then click Done.
Step 2: Add waypoints
Now that we have configured our mission, we'll add waypoints to tell our robot where to go on the map, and what to do when it gets there.
- In the upper-right corner of the module, you will now see the waypoints icon. Click the waypoints icon to open the waypoints sidebar.
- With the waypoints sidebar open, Shift + left-click to drop a waypoint. Configure its (x,y) position and orientation as desired.
Creating a path of sequential waypointsSequential Shift + left clicks will append new waypoints to the end of the path.
When a new waypoint is added, the previous waypoint will automatically adjust orientation to point towards the newest waypoint (unless orientation for the previous waypoint was manually set using the gizmo or manually entered in the sidebar).
To delete a waypoint, select the waypoint and click Delete. The waypoint prior to the deleted waypoint will automatically connect to the waypoint after the deleted waypoint, if available.
If you want to restart the path from scratch, click Cancel in the waypoint sidebar.
Step 3: Execute your mission
Once you have created your path of waypoints, click Send Path. This will send the path to your ROS Service. Once the ROS Service responds, the Mission Planning module shows the status of the Service call along with the path generated by the ROS Service.
If you notice an issue with this page or need help, please reach out to us! Use the 'Did this page help you?' buttons below, or get in contact with our Customer Success team via the Intercom messenger in the bottom-right corner of this page, or at [email protected].
Updated 3 months ago
