
Configure access levels
This guide will teach you the Formant access model for entities (views, commands, events, etc.), users, and data in your organization.
Introduction to tags
EntitiesThroughout the documentation center, we use the term entity to mean any object in Formant: a device, a user, an event, etc. If there are specific rules around a given entity (such as a device-to-user relationship), we use more specific terms.
You can restrict access levels to sets of entities by applying tags. A tag is a key: value pair applied to an entity in your Formant organization, such as site: albuquerque. By tagging several entities with the same set of tags, you can create logical sets of devices, users, and data with restricted access.
For a user to see an entity in Formant, that user must have a tag set that is equal to or a subset of the entity's tag set.
By adding more tags to an entity, you provide access to that entity to a greater set of users.
By adding more tags to a user, you restrict that user's access to the set of entities whose tags are equal to or a subset of the user's.
Access to data and events
When a device ingests data from a data stream, each datapoint is tagged with the union set of the device tags and the stream tags.
Data and events are immutableYou cannot retroactively change the tag set associated with historical data or events.
If you have a device with the tag set
key-1: value-1and no tags applied to the data stream, all data ingested by that device and all events triggered by that device will be taggedkey-1: value-1. Only users with a tag set ofkey-1: value-1or no tags will be able to see this data.If the user's tag set is updated to
key-1: value-1, key-2: value-2, that user will no longer be able to see data taggedkey-1: value-1, because the device's tag set is not equal to or a subset of the user's tag set -- it is a superset.If the device's tag set is then updated to
key-1: value-1, key-2: value-2, that user will be able to see all data ingested after this tag update, but not before: the user will only be able to see data taggedkey-1: value-1, key-2: value-2.If the device's tag set is then updated to
key-3: value-3, the user will be able to see all data before this tag update, but not after: the data which was ingested withkey-1: value-1, key-2: value-2keeps that tag set after the device's tags change, but the user does not have the new tag set, and so cannot see the new data.
Access to views
You can grant separate access levels for devices and users by providing a unique tag set for each.
In addition to the rules above, you can grant access to all users with a given tag key by selecting * for the tag value, such as key: *:
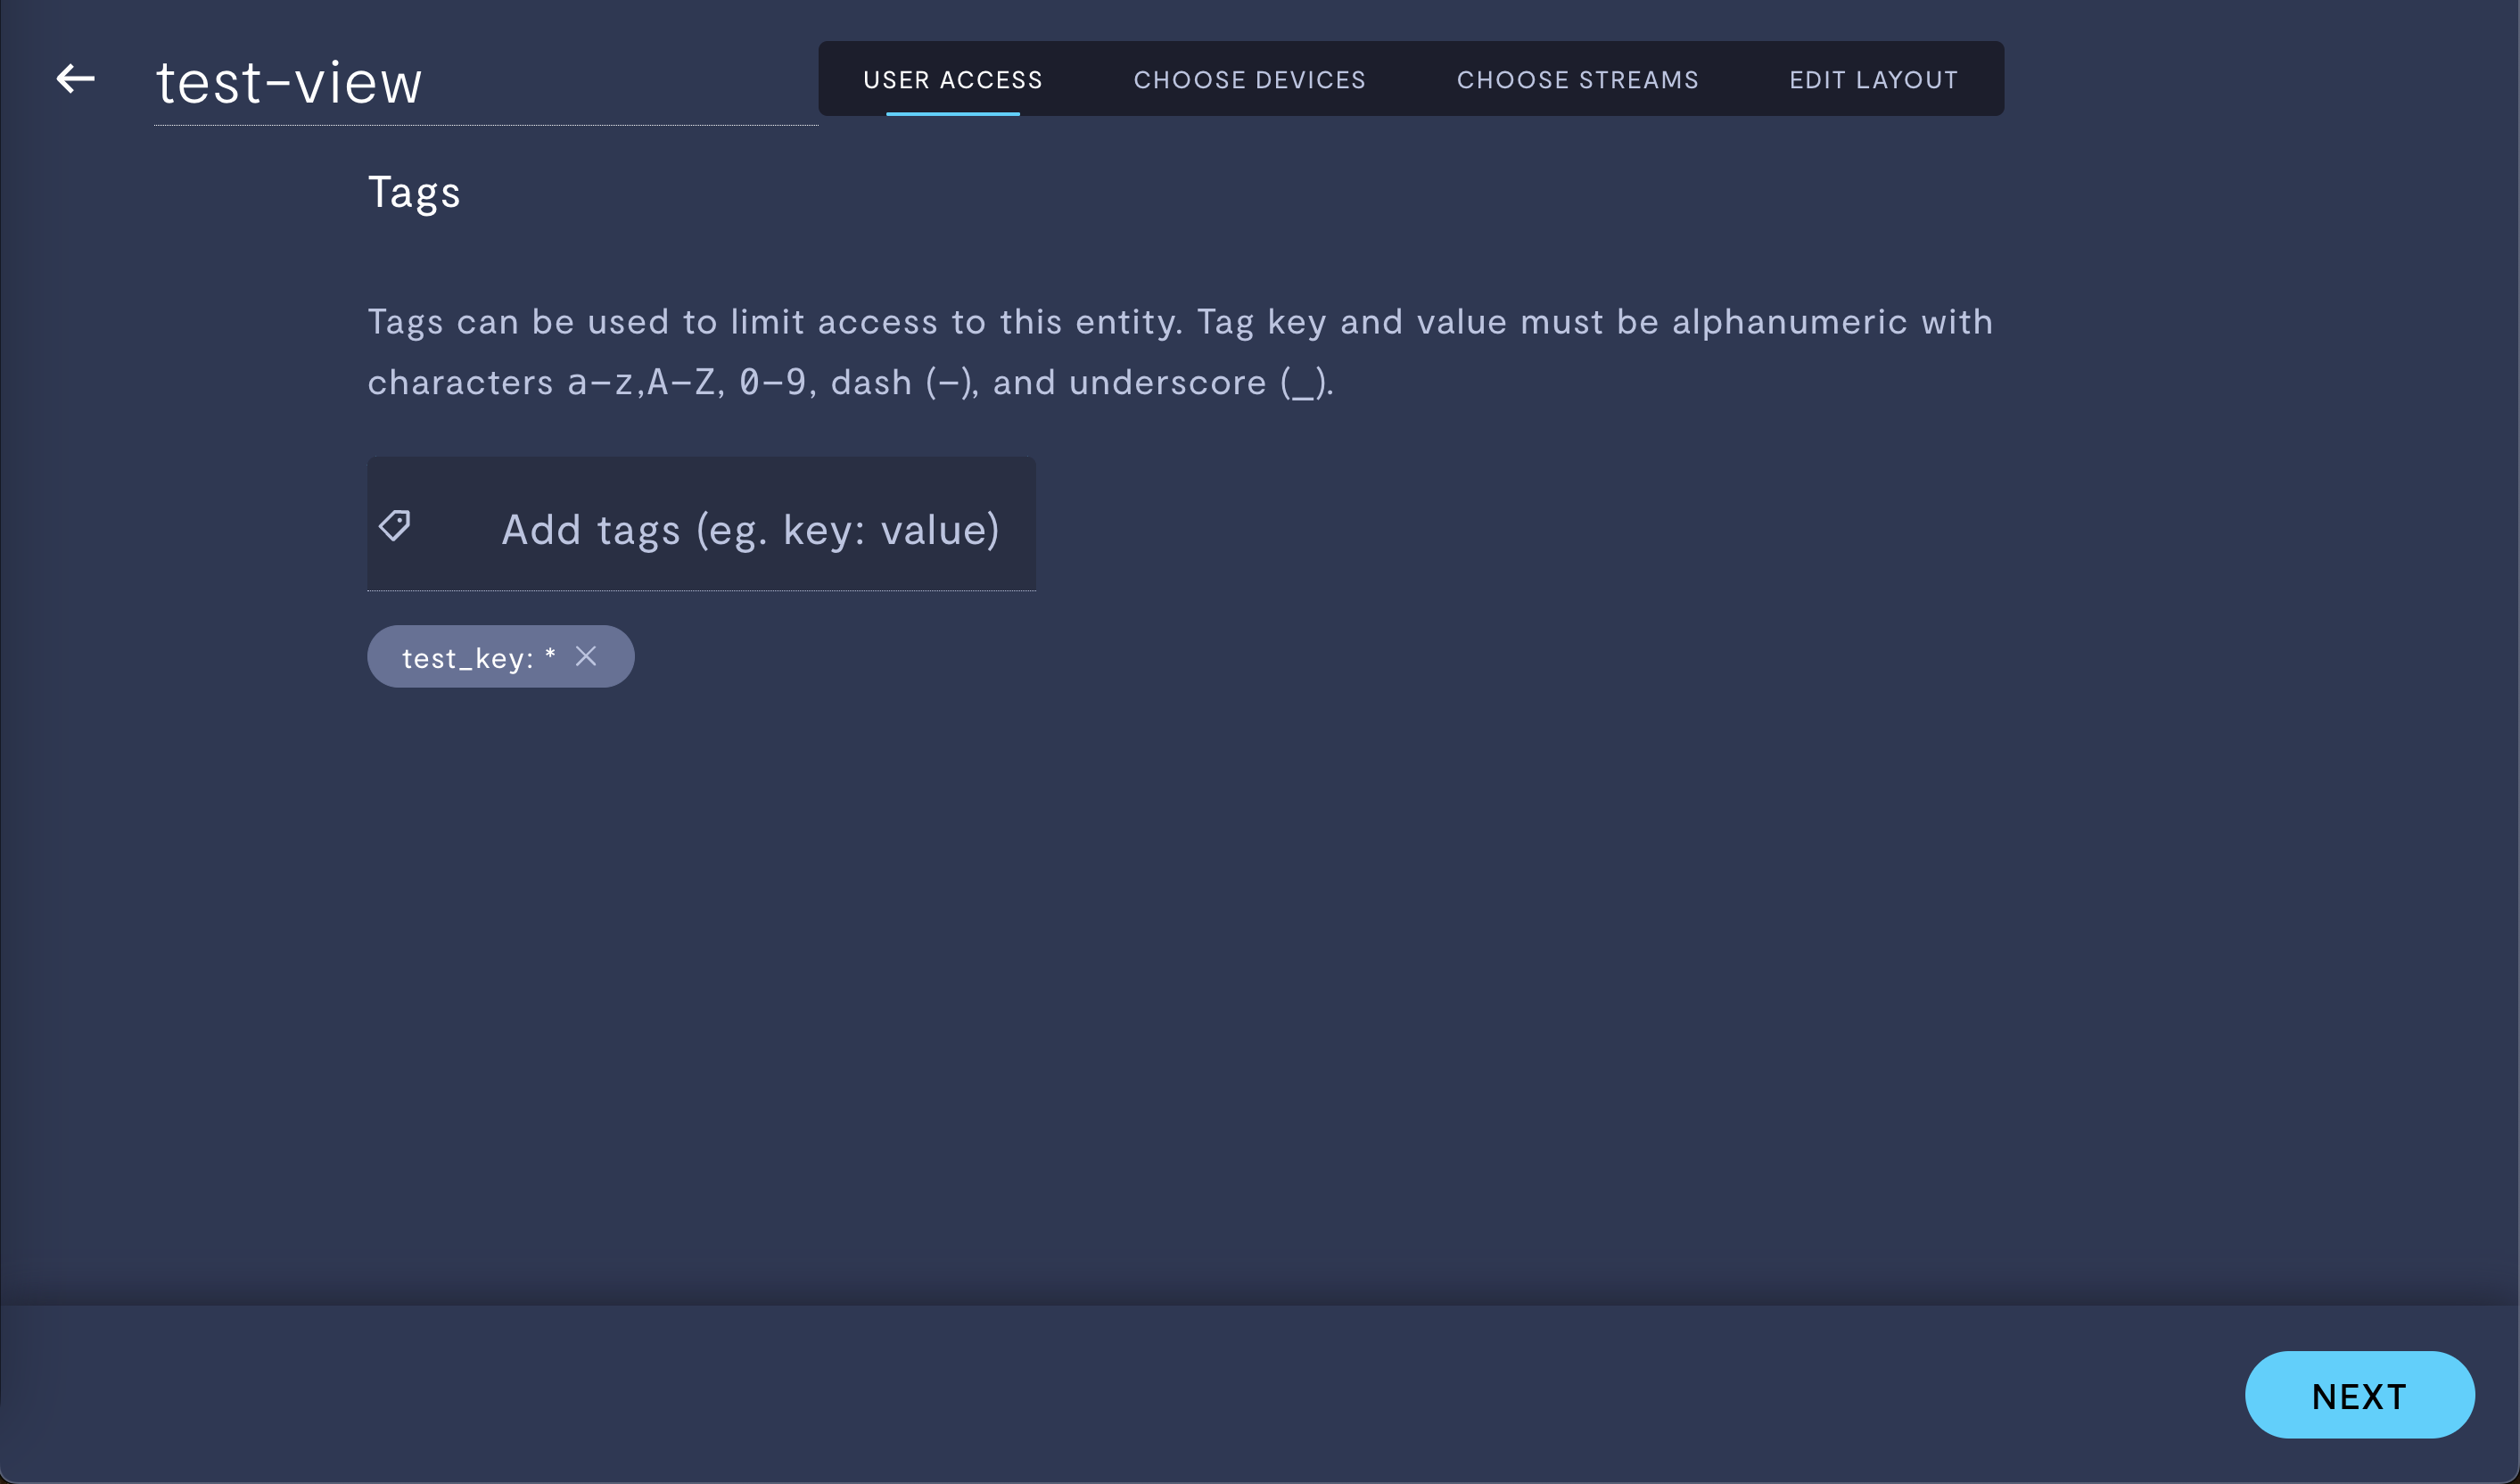
Granting access to a view to all users with the tag key test_key, regardless of the tag value.
Example 1: user and device tag sets
Suppose we have one user and one device. The following table explores different tag configurations:
| User tags | Device tags | Can user see device? | Rationale |
|---|---|---|---|
a: trueb: true | a: trueb: truec: true | Yes. | User's tag set is a subset of device tag set. |
a: trueb: truec: true | a: trueb: true | No. | User's tag set is not a subset of device tag set. User's scope is restricted to devices with at least the following tag set:
|
a: truef: true | a: trueb: true | No. | User's tag set is not a subset of device tag set. User's scope is restricted to devices with at least the following tag set:
|
Example 2: sample organization
Suppose you are configuring an organization with job sites in Albuquerque and Santa Fe. You only want operators to be able to see data and devices at their own site. You can add site: albuquerque and site: santa-fe to each set of devices, views, and users; each set will only be able to access entities and data with a matching value for the site tag.
Consider the following diagram:
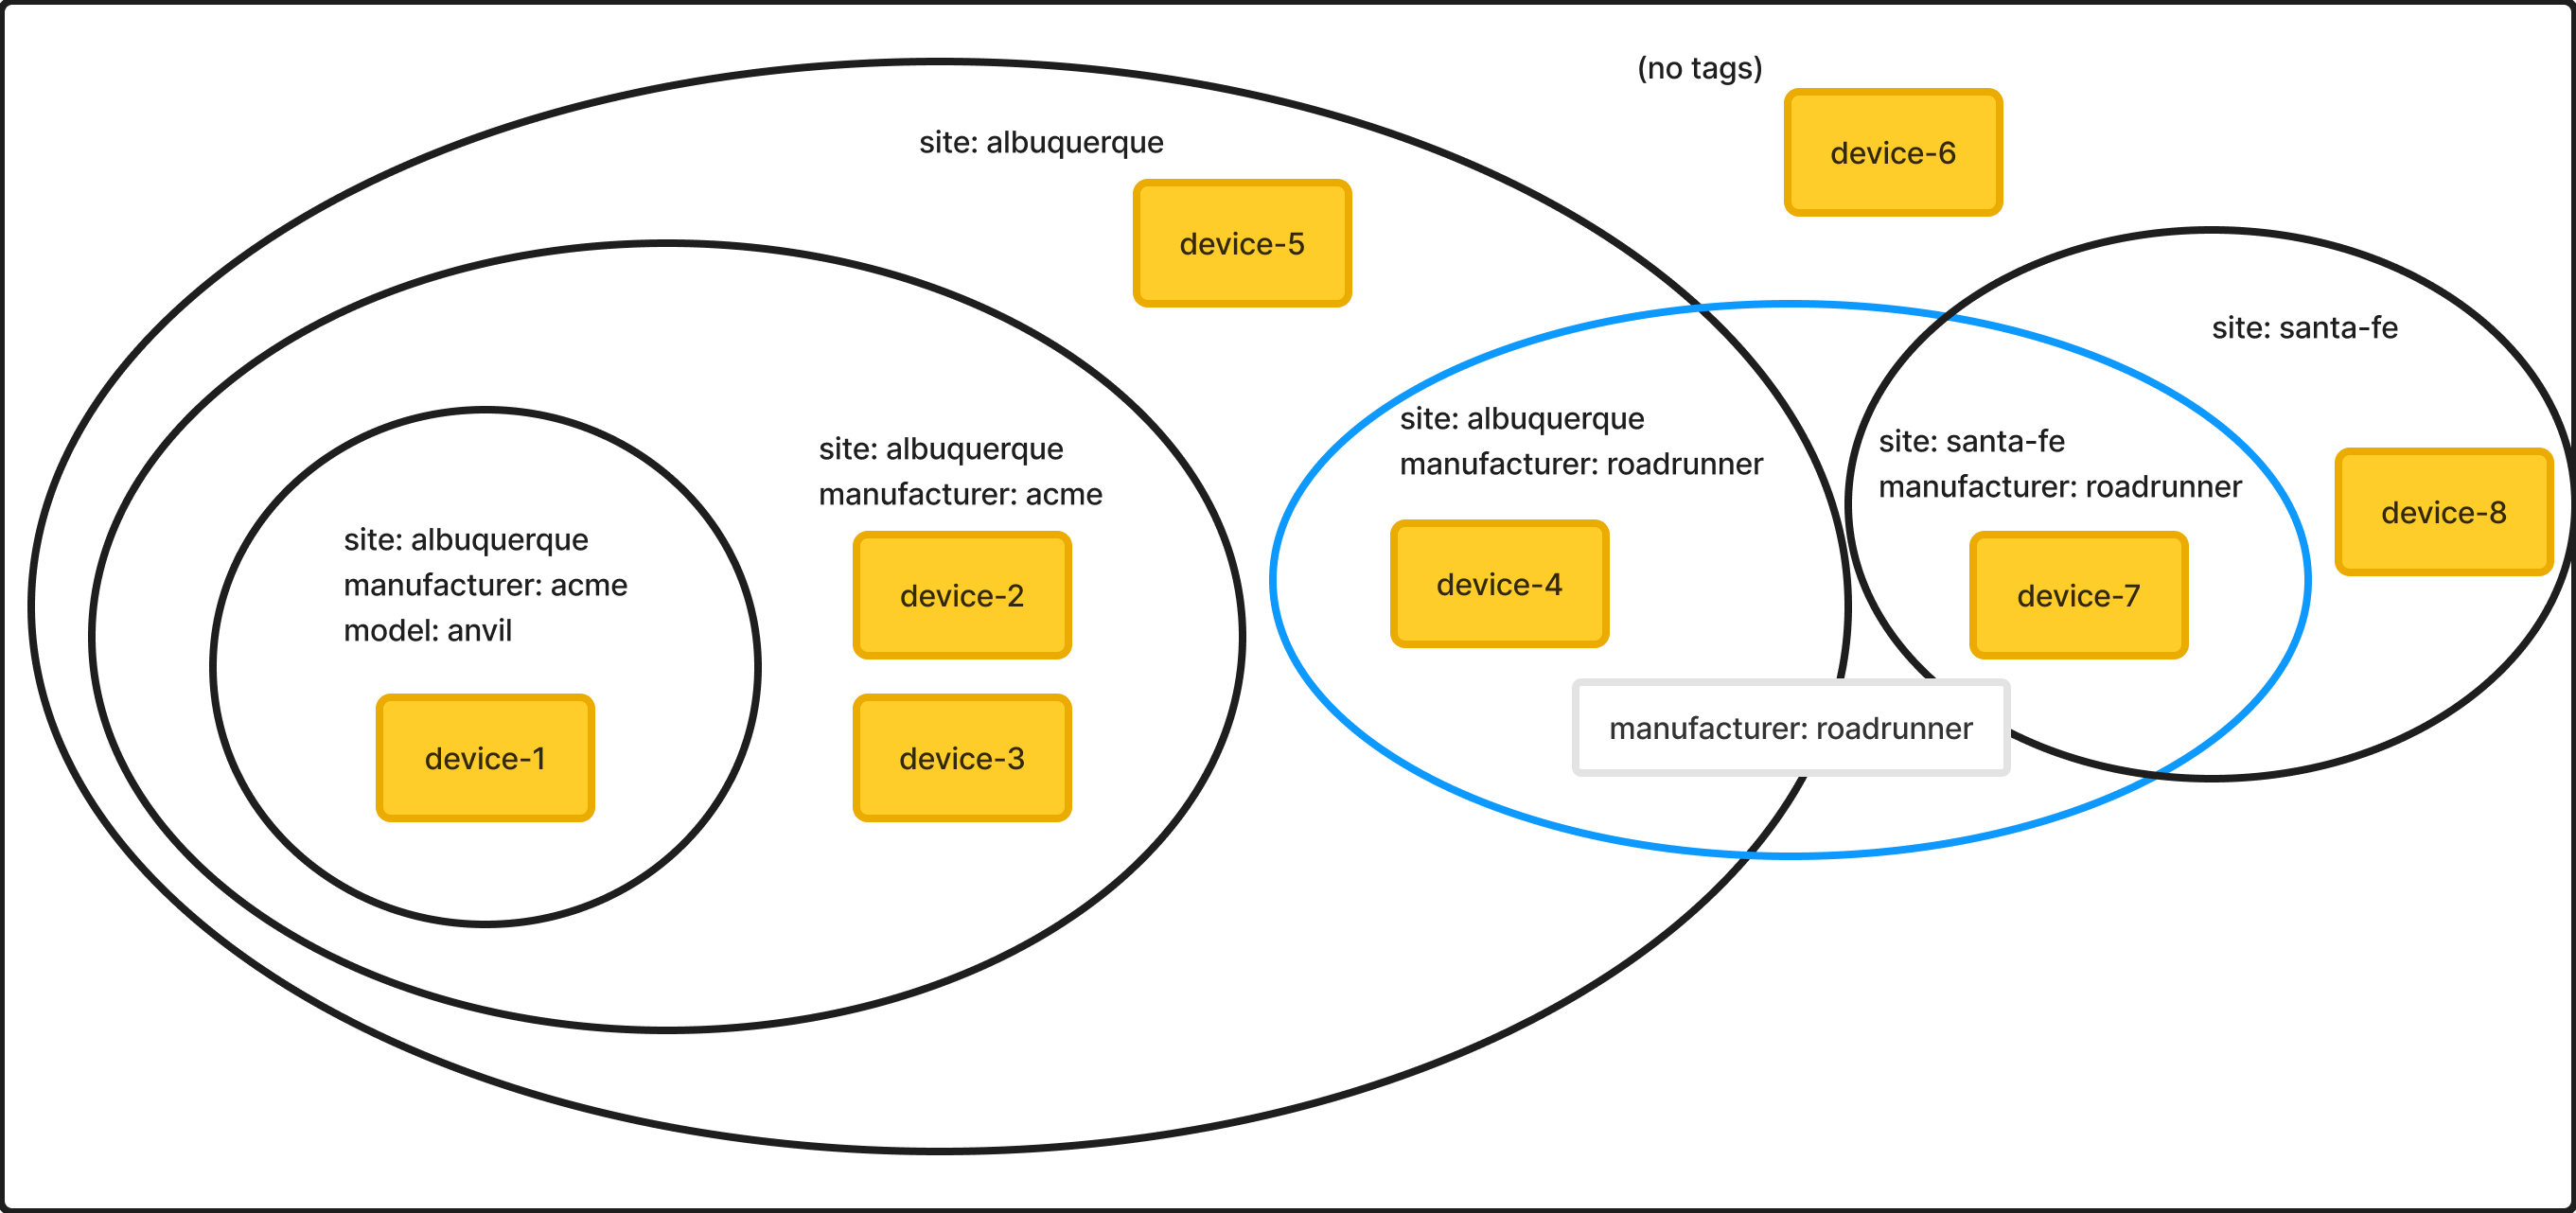
Example Formant organization. Users with listed tag sets can see everything inside their circle, and nothing outside of it.
Access levels to each entity are as follows:
| A user with tag set... | Can access... |
|---|---|
| (no tags) | Everything. |
site: albuquerque | device-1, device-2, device-3, device-4, device-5 |
site: albuquerquemanufacturer: acme | device-1, device-2, device-3 |
site: albuquerquemanufacturer: acmemodel: anvil | device-1 |
manufacturer: roadrunner | device-4, device-7 |
site: albuquerquemanufacturer: acmemodel: anviluser: wile-e-coyote | Nothing. |
See also
If you notice an issue with this page or need help, please reach out to us! Use the 'Did this page help you?' buttons below, or get in contact with our Customer Success team via the Intercom messenger in the bottom-right corner of this page, or at [email protected].