Create a device
This guide will teach you how to create a device, add it to your Formant organization, and configure it.
Step 1: Add device
If this is the first device for your organization, you will be prompted to Add device from the signup screen.
If you are not prompted from the signup screen:
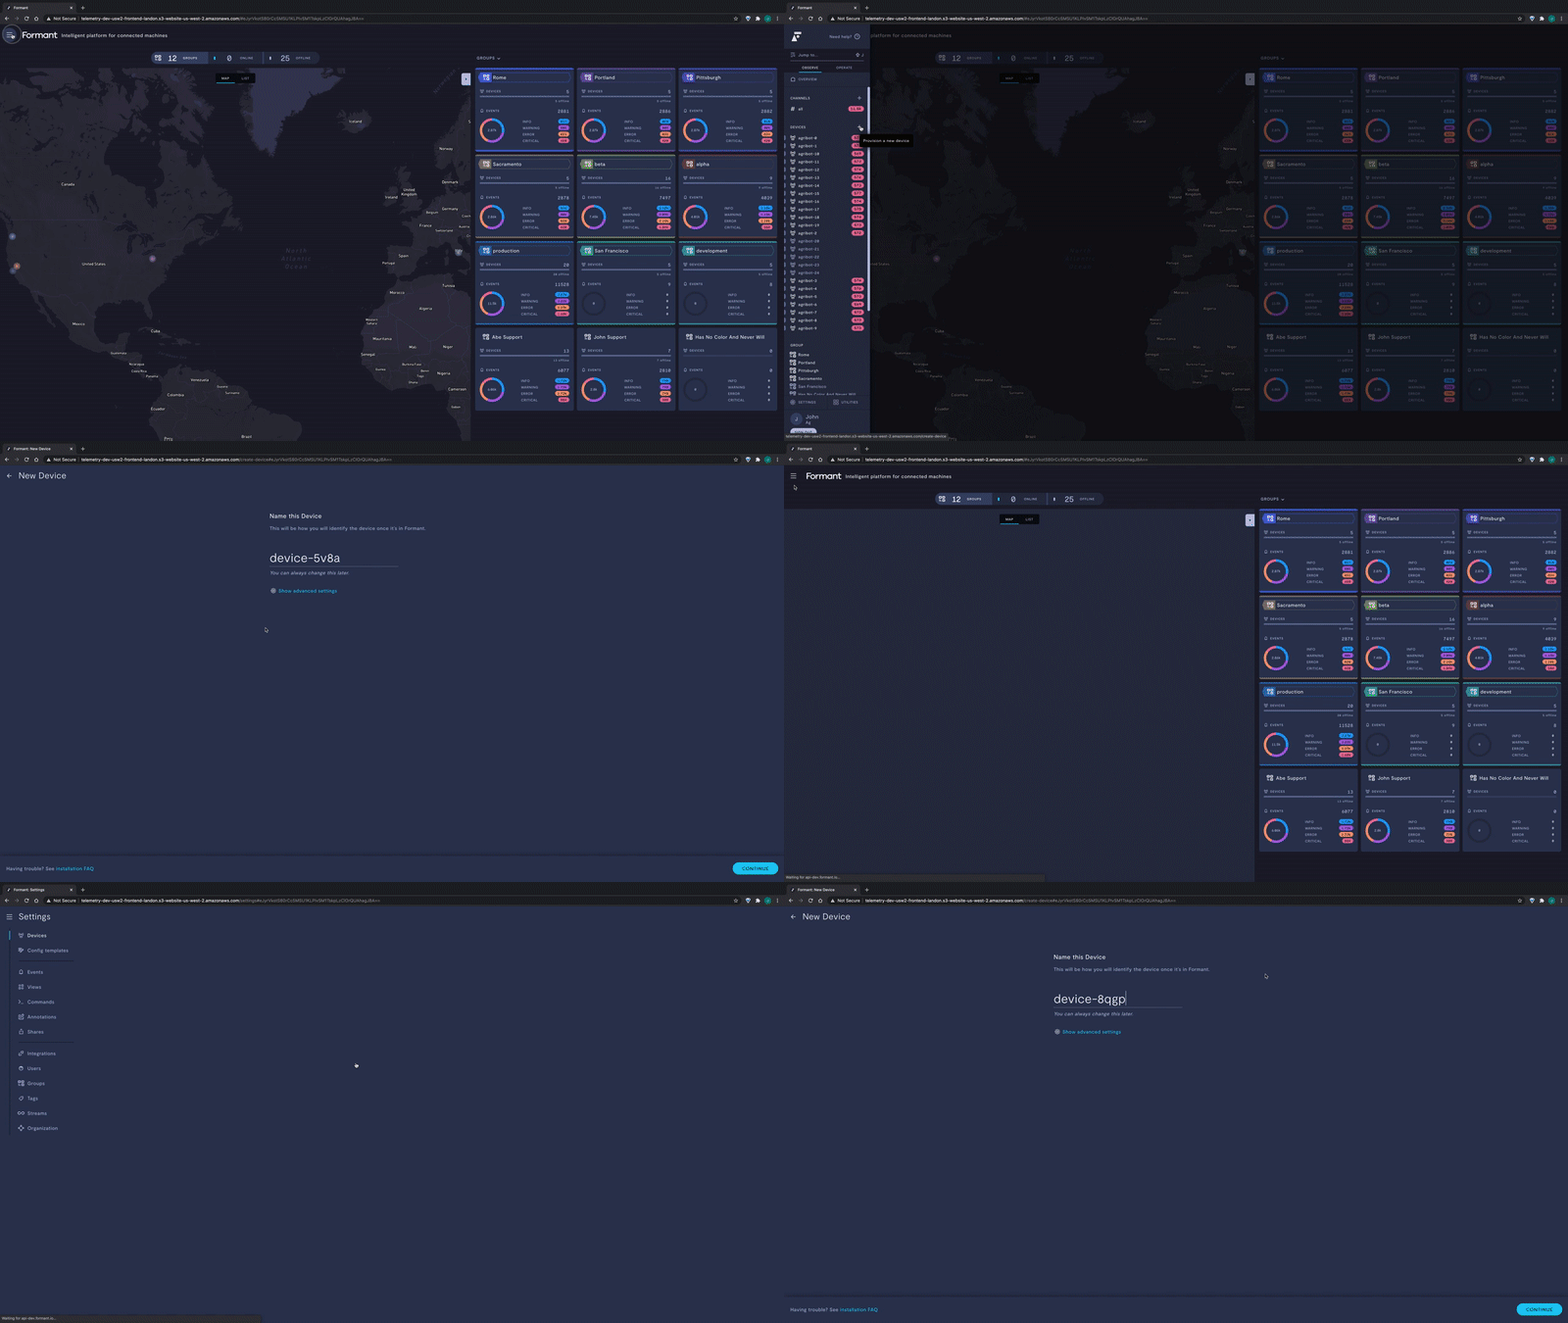
- In Formant, open the menu in the upper-left corner and click Settings.
- Click Devices, and then click the Add device button in the upper-right corner.

How to navigate to the "Add device" workflow
Step 2: Basic device configuration
- Give your device a name.
- (Optional) Configure advanced settings for your device:
- Tags: Tags add metadata to your device which allows you to add it to device groups, configure notifications, or control user access. For more information, see Configure access levels.
- Configuration template: You can duplicate the configuration of an existing device using a configuration template. For more information, see Configuration templates.
- Autoconfigure: If you enable this feature, Formant will choose a default set of streams, views, and modules to quickly set up your device.
- Click Continue.
When you click Continue, you will be shown a provisioning script for your device. If you would like to provision your device now, proceed to Install the Formant agent.
If you want to install the Formant agent via Docker, do not run the provisioning script and proceed to Install the Formant agent via Docker.
Step 3: Further device configuration
This guide will provide a general overview device configuration. Where configuration is more complex, or relates to a topic with more in-depth documentation, a link will be provided to the relevant page.
To access the device settings window:
- From the device view, click the three dots in the upper-right corner >> Configure device.
- From the Formant homepage, open the menu in the upper-left corner and click Settings >> Devices, and then click on your device.
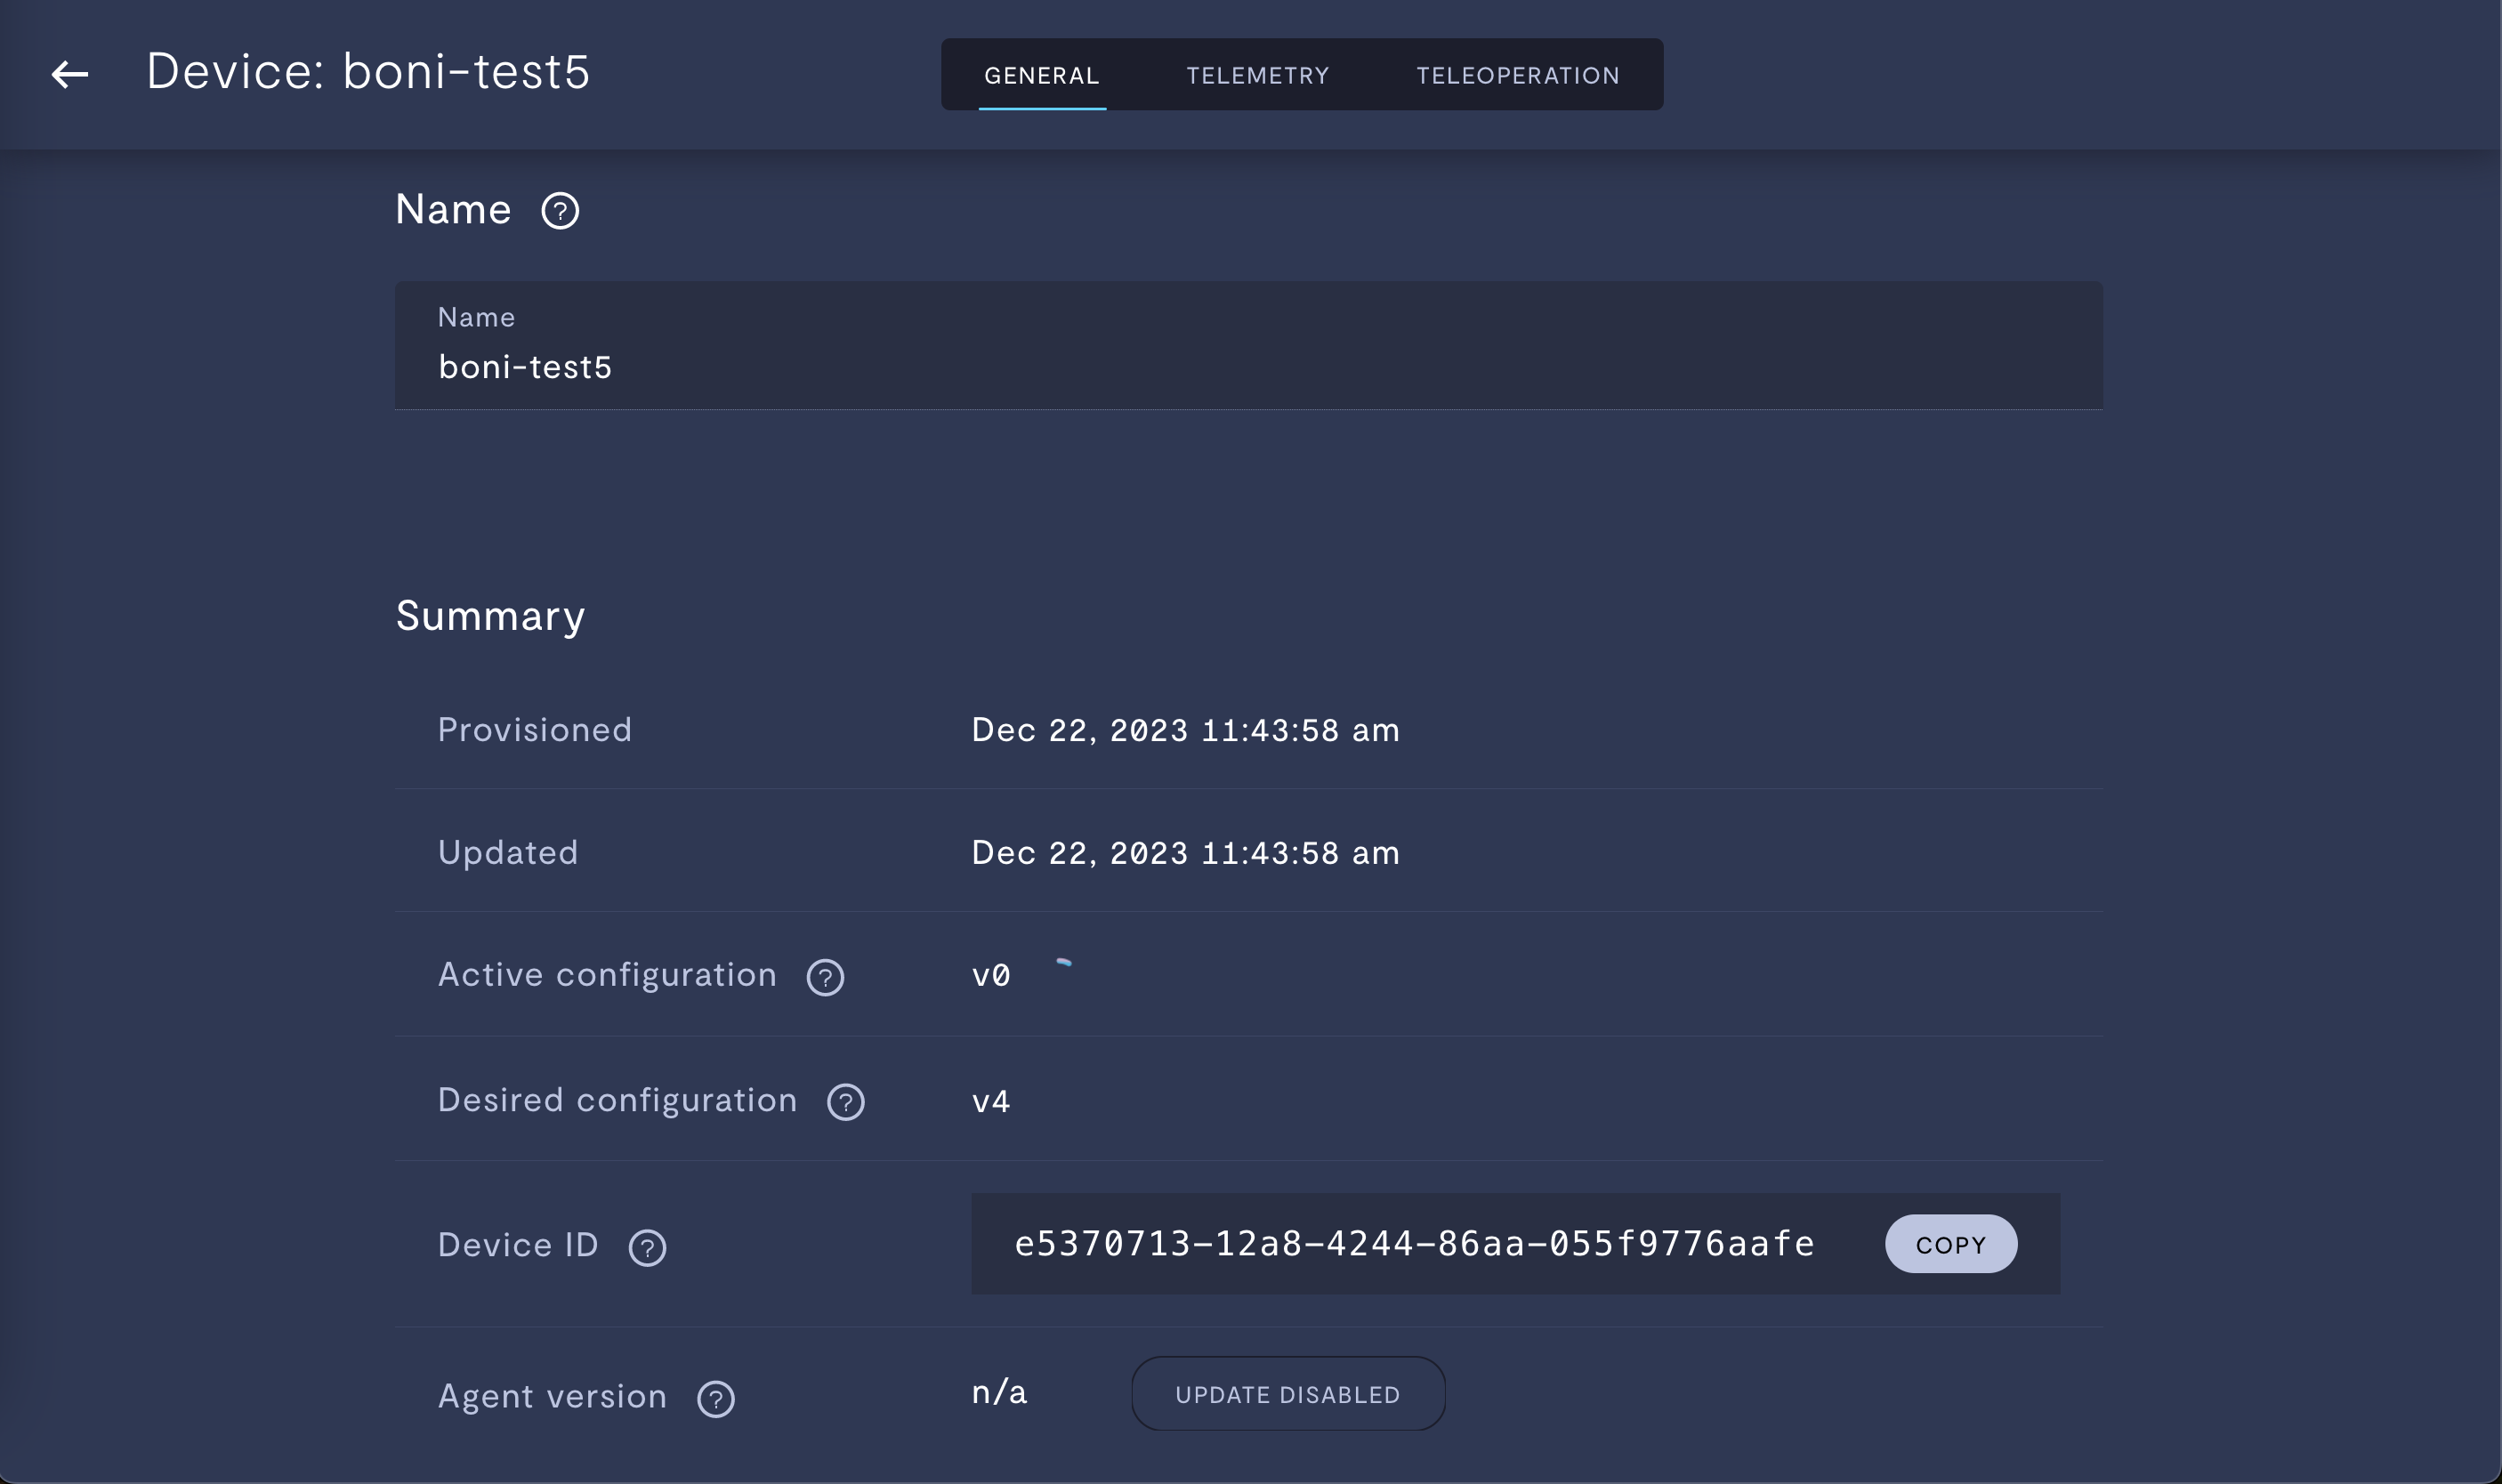
General settings

| Property | Usage |
|---|---|
| Name | View or change your device name. |
| Provisioned | Gives the timestamp at which the device was first provisioned. |
| Updated | Gives the timestamp at which the Formant agent was last updated. |
| Device ID | Gives the device's ID. |
| Agent version | Gives the version of the agent currently running on the device. |

Property | Usage |
|---|---|
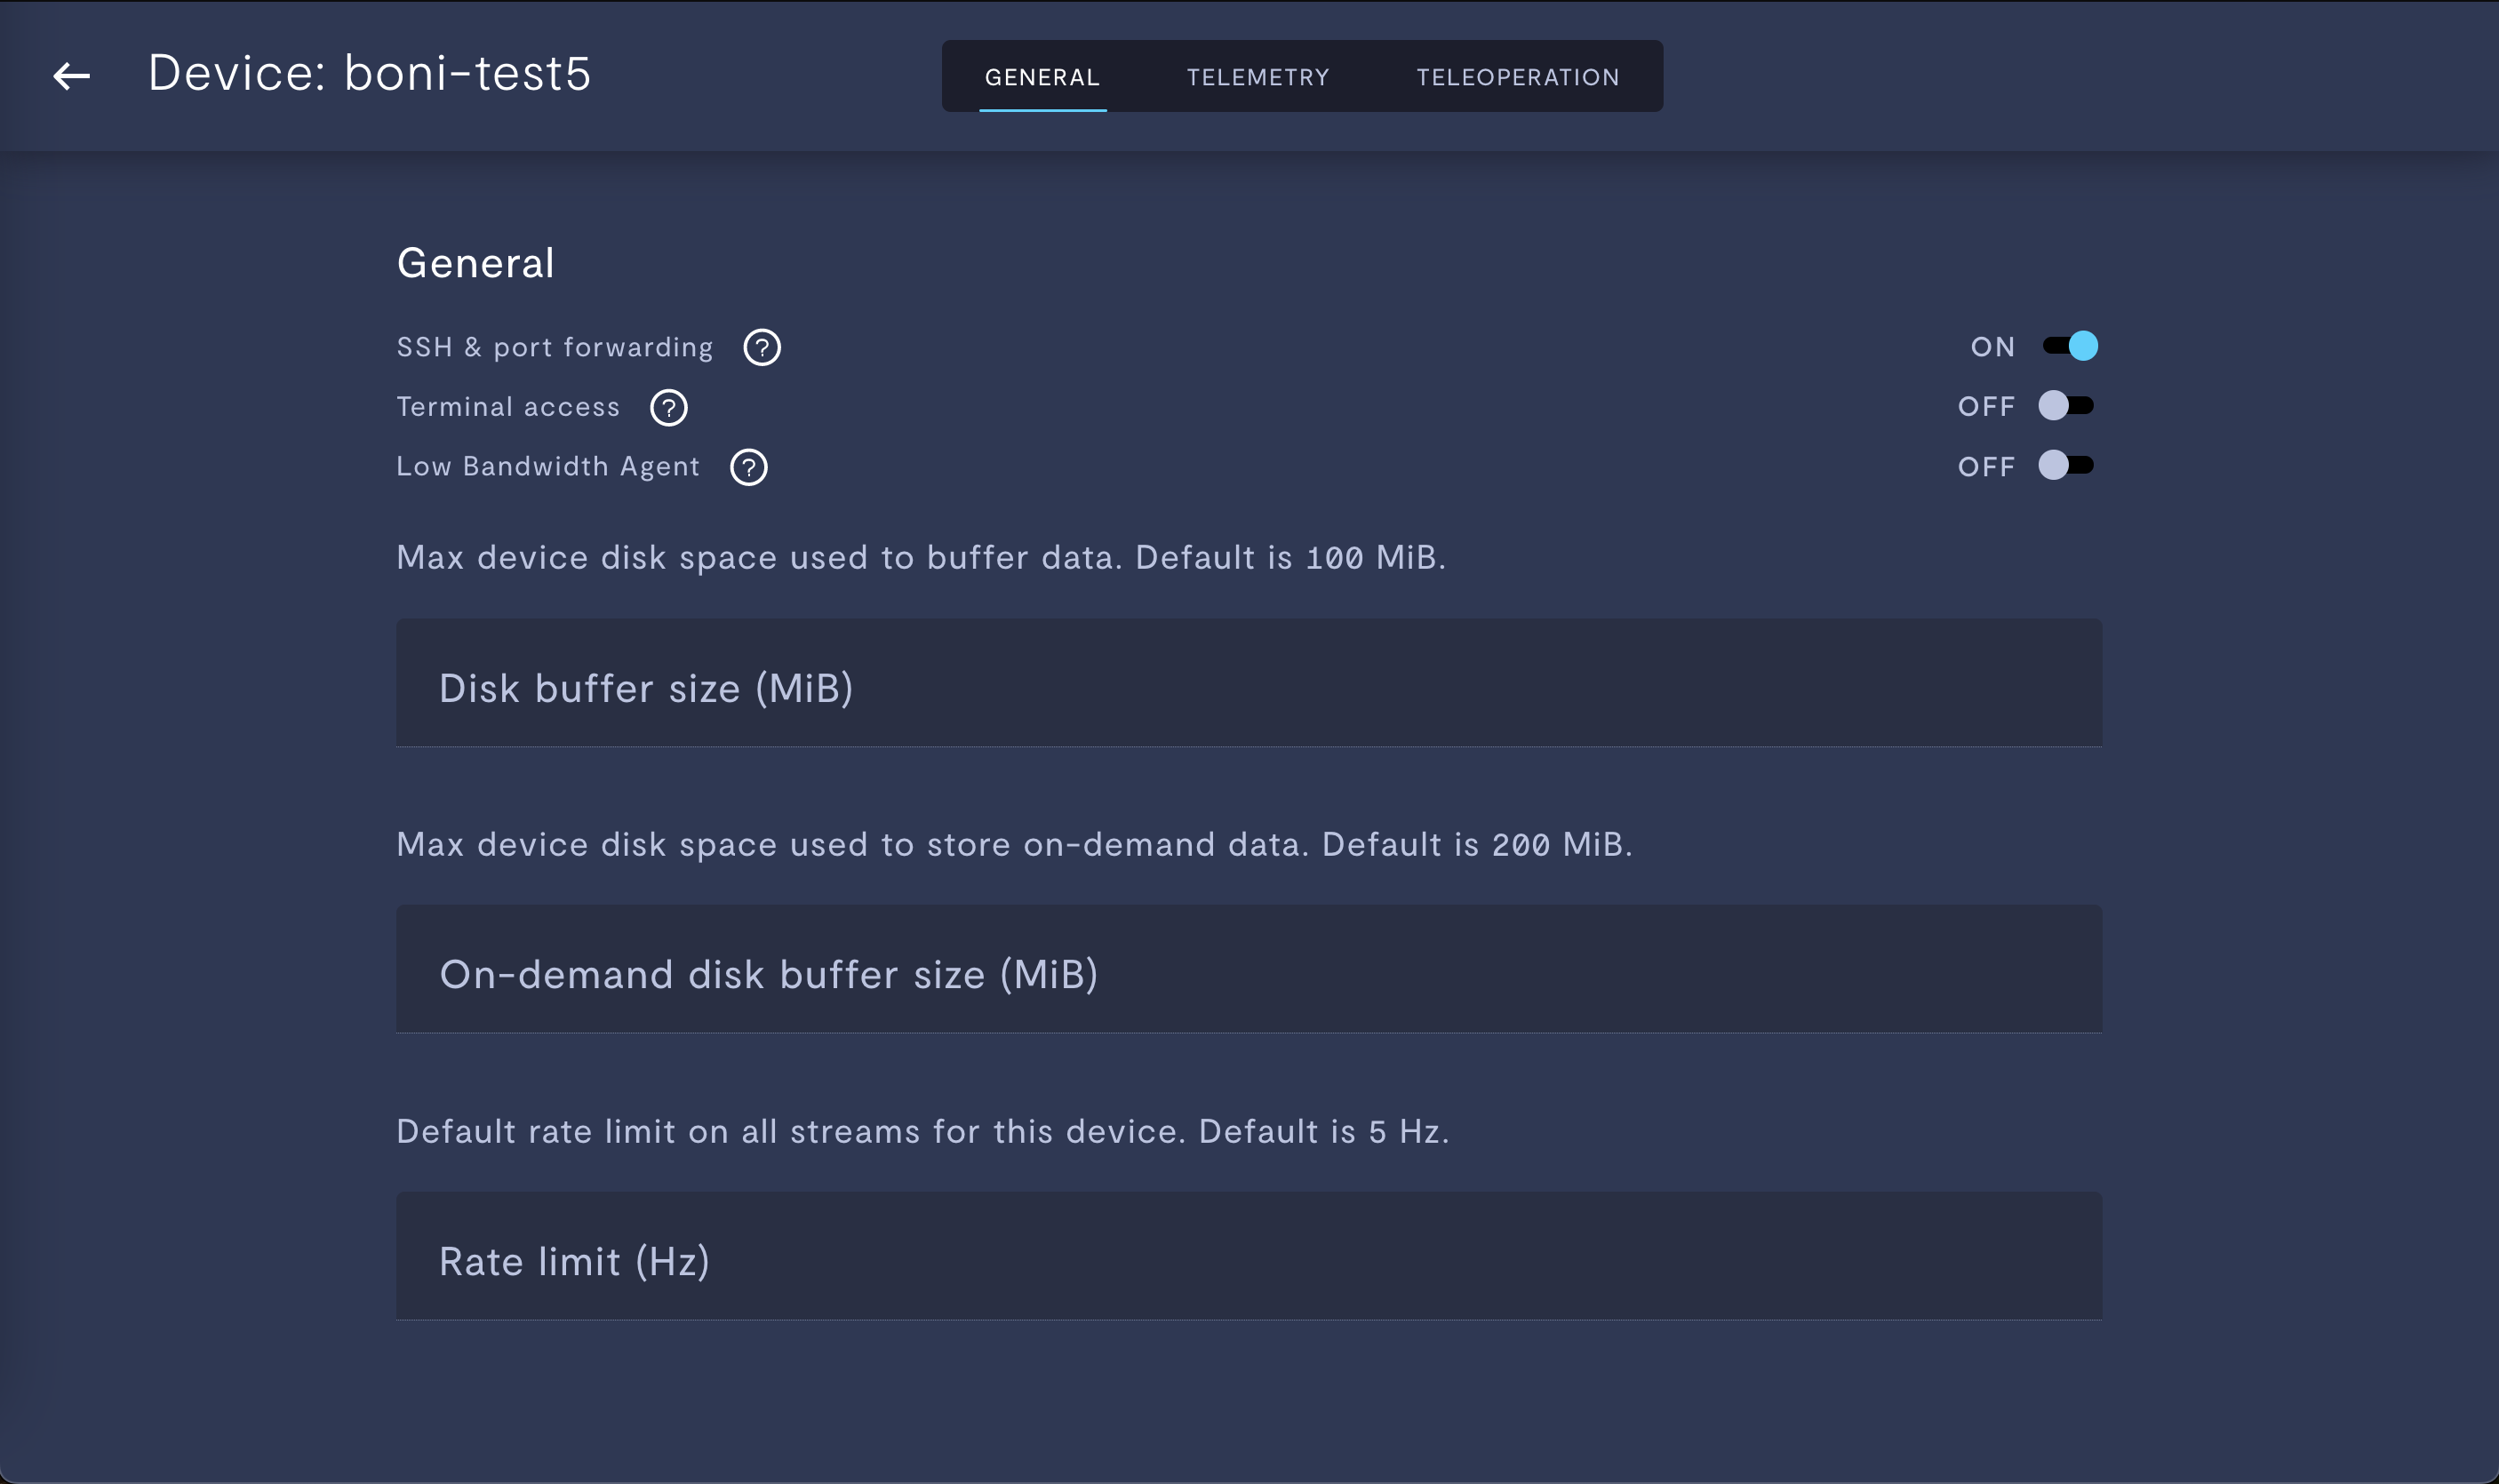
SSH & port forwarding | Enable or disable SSH and port forwarding for your device. |
Terminal access | Enable or disable terminal access from the Formant web application to your device. |
Low Bandwidth Agent | Enable or disable low bandwidth mode. When set to ON, the rate at which streams ingest data is reduced. Telemetry and teleoperation performance may be degraded. |
Disk buffer size (MiB) | Set the maximum disk space the Formant agent is allowed to use on your device to buffer data. The default is 100 MiB. |
On-demand disk buffer size (MiB) | Set the maximum disk space the Formant agent is allowed to use on your device to buffer on-demand data. The default is 200 MiB. For more information on on-demand data ingestion, see On-demand streams. |
Rate limit (Hz) | Restrict the rate of update for all data streams on this device. The default value is 0.5 Hz. |
Further configuration
Documentation for the following device configuration options is presented in an in-depth, task-oriented way:
Topic | Explanation and reference |
|---|---|
Adapter configuration | See Adapters. |
URDF | See URDF. |
Tags | |
Application configuration | Requires use of the Formant Agent SDK. Store key-value pairs on this device. These can be called by a dedicated method of the Agent SDK, For more information on the Agent SDK, see Agent SDK installation and overview. |
Blob data | Requires use of the Formant Agent SDK. Store text in any format. This can be called by a dedicated method of the Agent SDK, For more information on the Agent SDK, see Agent SDK installation and overview. |
Followers | |
Slack channels | See Send events to Slack. |
If you notice an issue with this page or need help, please reach out to us! Use the 'Did this page help you?' buttons below, or get in contact with our Customer Success team via the Intercom messenger in the bottom-right corner of this page, or at [email protected].
Updated about 1 month ago
