Add a video stream
Video streams allow you to quickly and easily see what your robot is seeing and greatly aid in teleoperation. Formant supports USB and IP video streams via Real-Time Streaming Protocol (RTSP) and Real-Time Messaging Protocol (RTMP).
This guide will teach you how to configure a USB or IP video stream on your device.
Step 1: Create a video stream
- In Formant, in the upper-left corner, open the menu and click Settings.
- Click Devices, and then click on the device you want to configure.
- Click the Telemetry tab, and then click Add Stream.
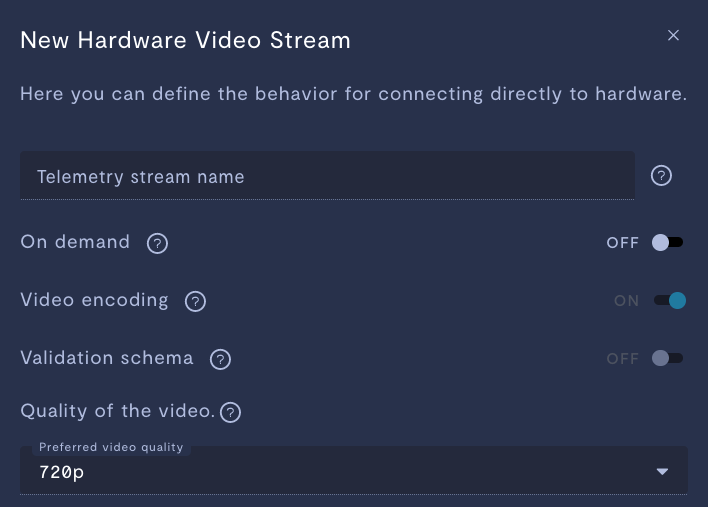
- Click Hardware Video. This will open the New Hardware Video Stream configuration window:

Property | Usage |
|---|---|
Telemetry stream name | Give the stream a name. |
On demand | If ON, this stream will store data locally on your device, and only upload data to Formant when you click Retrieve on-demand data. If OFF, this stream will ingest periodically. |
Quality of the video | Select your video quality. Higher video quality requires more bandwidth. |
The next few options depend on whether you are configuring a USB camera, or an IP camera over RSTP or RTMP.
Step 2: Configure a camera
USB
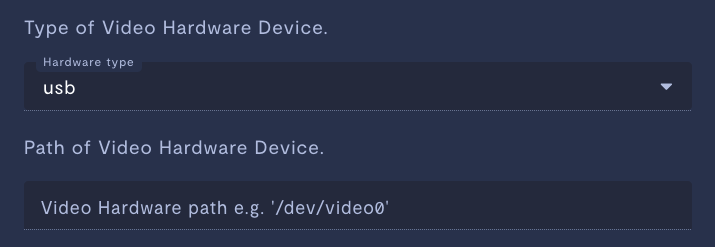
For USB devices, you can simply enter the path to the device file:

| Property | Usage |
|---|---|
| Video Hardware path | Enter the path to the Linux device file. This dropdown will auto-populate with devices detected by Formant. |
Once configured, the Formant agent will automatically read the image stream from the selected USB camera, encode it to H.264, and ingest it as a video stream.
IP camera
Formant supports IP cameras via RTSP and RTMP, as well as the ONVIF protocol.

Property | Usage |
|---|---|
Video RTSP URI | Enter the URI of your camera in the following format: |
Encoding required | Set this to YES if the video has any encoding other than H264. |
Supports ONVIF (RTSP only) | Set this to YES if your camera supports the ONVIF protocol. |
Username | Enter the username to access your camera. |
Password | Enter the password to access your camera. |
Step 3 (optional): Configure audio
You can add an audio source to your video stream:

| Property | Usage |
|---|---|
| Audio Hardware name | Enter the name of the audio device you want to associate with this video stream. |
Step 4 (optional): Tag your data
Add tags to your video stream using the following options:

| Property | Usage |
|---|---|
Add tags (e.g. key: value) (optional) | Add tags to each datapoint of this stream. For more information on tags, see Configure access levels. |
When you're finished configuring your stream, click Done, and then Save.
Step 5: Add stream to a view
Once you've added a stream to your device, your next step is to add it to a view in Formant.
Add the streams you want to visualize, and then move on to Viewing data in Formant.
If you notice an issue with this page or need help, please reach out to us! Use the 'Did this page help you?' buttons below, or get in contact with our Customer Success team via the Intercom messenger in the bottom-right corner of this page, or at [email protected].
Updated about 2 months ago
